Small Apartment Storage Ideas
Entryway Shoe Storage Ideas for Small Apartments
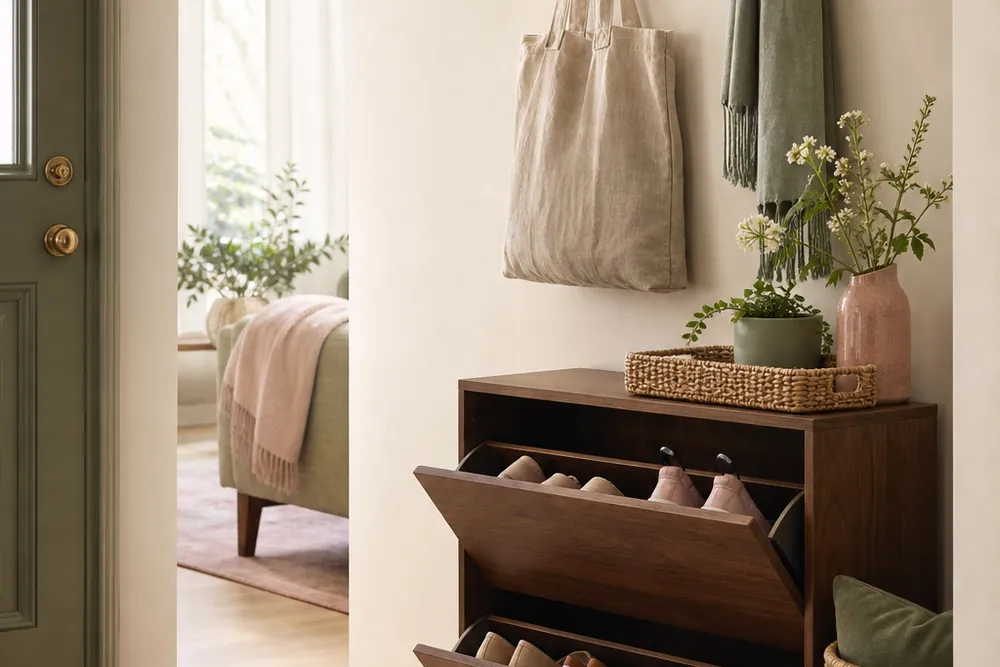
In many small apartments, the entryway is a door opening into a strip of hallway. That strip has to support arrivals, departures, deliveries and wet weather without becoming an obstacle course. Effective shoe storage starts by protecting movement, then assigning a small active rotation instead of trying to store every pair at the door.
These are storage formats to evaluate, not individual product picks. Measure the room and the household’s shoes, check the lease before mounting anything, and follow stability and load instructions for any furniture.
Map the door and walkway first
Open the entrance door through its full arc and mark the swept area with removable floor tape if needed. Measure the remaining wall depth at the narrowest point, including baseboards, radiators, switches and trim. Walk the route with a bag in each hand and make sure a storage unit would not catch clothing or force a sideways turn.
Also open nearby closet doors and interior doors. A bench that fits against the wall can still prevent another door from opening. Preserve access to panels, outlets and building controls, and do not narrow a required exit path; property rules and local requirements take priority over a storage plan.
Count the active shoe rotation
For one week, note the pairs that actually land by the door. Separate dry daily shoes, wet-weather footwear, house shoes and occasional pairs. The entry should hold the active group plus a small buffer, not the entire wardrobe. Move off-season shoes to the small-closet organization plan and review the rotation when weather changes.
Measure the tallest, widest and longest pair in the active group. Interior shelf dimensions matter more than a seller’s pair count because shoe sizes and shapes vary.
1. Start with a washable landing tray
A low tray contains water and grit while footwear dries. Size it for the wettest daily pairs and place it outside the door swing. A raised rim controls runoff, but it can also be a trip edge, so keep it visible and out of the main step path.
Empty and wipe the tray rather than letting damp shoes remain enclosed. It is a weather buffer, not long-term storage.
2. Choose an open rack for airflow
A two-level freestanding rack uses vertical space and keeps daily shoes visible. Check shelf height for boots, the footprint at the feet and the loaded stability. An open rack is quick to reset and lets footwear air, but mixed colors and shapes remain visible. Limit the number of pairs instead of trying to disguise an overfull rack.
3. Use a bench only when sitting clearance exists
A storage bench combines a seat with shoe shelves or a compartment. It needs enough depth for someone to sit without blocking the walkway and enough clear area for knees and the door. Measure the complete footprint and seat height rather than assuming a narrow-looking bench is compact.
Open cubbies ventilate better; closed compartments reduce visual noise but should not receive wet footwear without an appropriate drying plan.
4. Compare a slim tilt-out cabinet carefully
Tilt-out cabinets use shallow wall depth by holding shoes at an angle. Their usable interior depends on shoe length, heel shape and compartment geometry. Test the open front projection as well as the closed depth, and verify that baseboards do not push the unit into the path.
Tall, shallow furniture may require wall anchoring for stability. If the manufacturer requires anchoring and the lease does not permit an approved method, this format is not suitable. Do not treat “freestanding” marketing as a substitute for the safety instructions.
5. Give each person a handled basket
A low basket can work for a very small current rotation, especially soft house shoes or children’s lightweight pairs. It is easy to carry to another closet and adapts when the household moves. The trade-off is that shoes stack and the bottom pair is harder to reach. Choose a washable liner and keep damp footwear on the tray until dry.
The storage-bin material guide explains why woven, fabric and washable rigid containers belong in different conditions.
6. Use the inside of a closet door when clearance permits
An over-door organizer can move footwear away from the entry floor. Measure the top gap, door thickness, handle position and distance to shelves behind the door. Load can change how a lightweight door closes, and pockets must not cover vents or rub adjacent walls.
Keep heavier shoes low and respect the organizer and door hardware limits. If the door operation changes, reduce the load or choose another zone.
7. Add one key-and-bag landing place
Shoe clutter often grows because keys, mail and bags share the same undefined area. Use an existing ledge, a shallow freestanding console or a small dish to give keys a home. Add a basket beneath only if it stays outside the walkway.
Adhesive hooks are optional, not the default. Check the lease, surface type and manufacturer process, patch-test where appropriate and keep loads conservative. A floor-standing hook or closet hook avoids uncertain paint.
8. Create a maintenance kit, not a supply pile
A small cloth, shoe brush and approved care item can live near the tray in one handled container. Keep chemicals according to their labels and away from children, pets, food and heat. Bulk refills belong in a suitable storage zone elsewhere.
9. Make the reset obvious
At the end of the day, wet pairs go on the tray, dry active pairs return to the rack or cabinet, and anything outside the current rotation moves to the closet. A system that needs complex sorting will fail during a rushed departure. Labels by person or use can help, but a strict pair limit does most of the work.
Account for trade-offs and limits
Open storage offers speed and ventilation while exposing visual clutter. Closed storage calms the view while adding depth and concealing dampness. Benches combine functions but consume the most floor area. Door storage saves floor space but adds load and clearance constraints. Baskets move easily but provide less separation.
Choose the format that passes the doorway test first. Then compare capacity, cleaning and moving. Do not block a door, heater, panel or required route to gain one more shoe row. Follow any furniture anchoring instruction and request owner approval where attachment is necessary.
For the broader move-in order, use the first-apartment organization checklist. For low-cost supporting pieces, see the renter storage budget guide, or return to all eight guides.
Frequently asked questions
What is the first measurement for a narrow entryway?
Measure the clear depth outside the full door swing and the route people use while carrying bags. That usable strip, not the wall length alone, determines what can fit.
Is open or closed shoe storage better?
Open storage supports airflow and fast access but shows more clutter. Closed storage looks calmer but needs greater depth, door clearance and a plan for damp footwear.
How many shoes should stay at the door?
Keep the pairs used in the current week, adjusted for household routines and weather. Move occasion and off-season pairs to a closet so the entry system can reset easily.